

1Step 1: Install the App
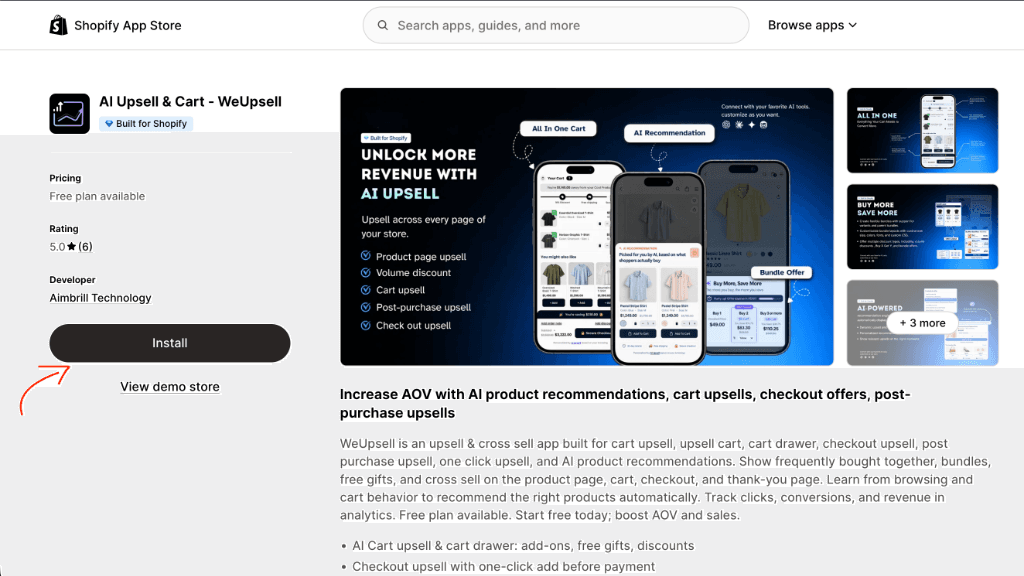
Open the AI Upsell & Cart ‑ WeUpsell listing in the Shopify App Store and click Install. Complete the Shopify app installation to enable AI Upsell & Cart ‑ WeUpsell on your store.
Tip: If you already have AI Upsell & Cart ‑ WeUpsell installed on your Shopify store, you can skip directly to Step 2.
2Step 2: Open the MCP Connector
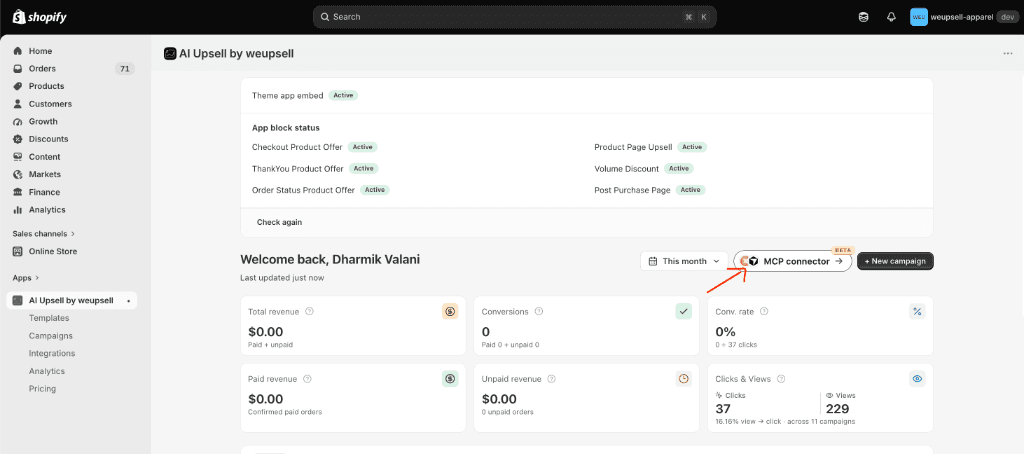
In your Shopify Admin, navigate to Apps → AI Upsell & Cart ‑ WeUpsell. On the main app dashboard, locate and click the MCP connector button positioned next to New campaign.
3Step 3: Go to the Integrations Page
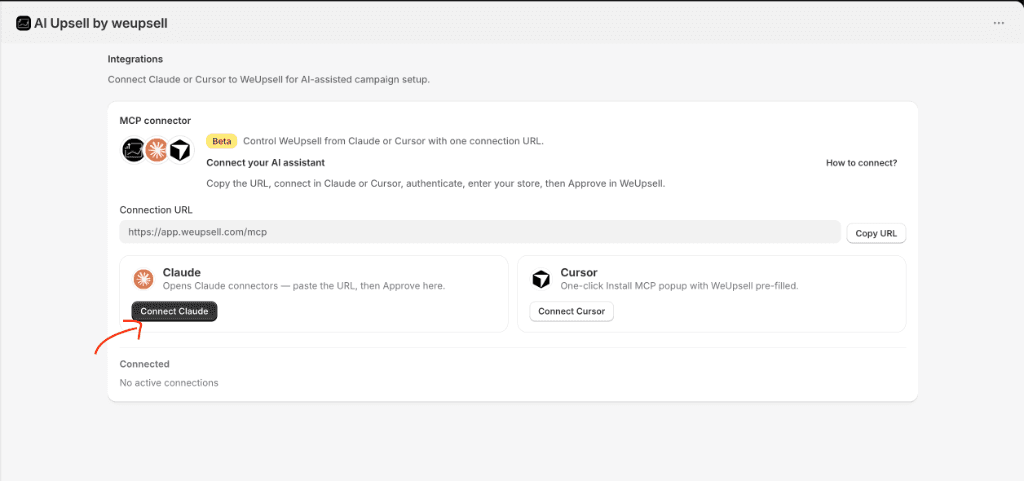
You will be taken to the Integrations page. Here you will find your unique Connection URL:
Click Connect Claude. In the Connected section below, it will show "No active connections" until authorization is completed.
4Step 4: Copy the Connection URL
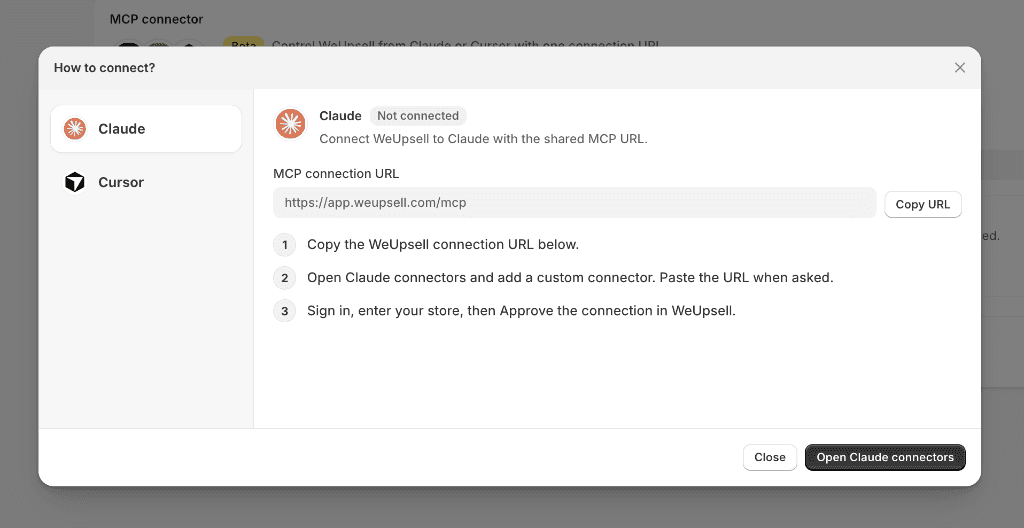
The How to connect? modal window will open with the Claude tab selected and the status showing Not connected.
- Click Copy URL to copy
https://app.weupsell.com/mcpto your clipboard. - Click Open Claude connectors to launch your Claude settings in a new tab.
5Step 5: Add a Custom Connector in Claude
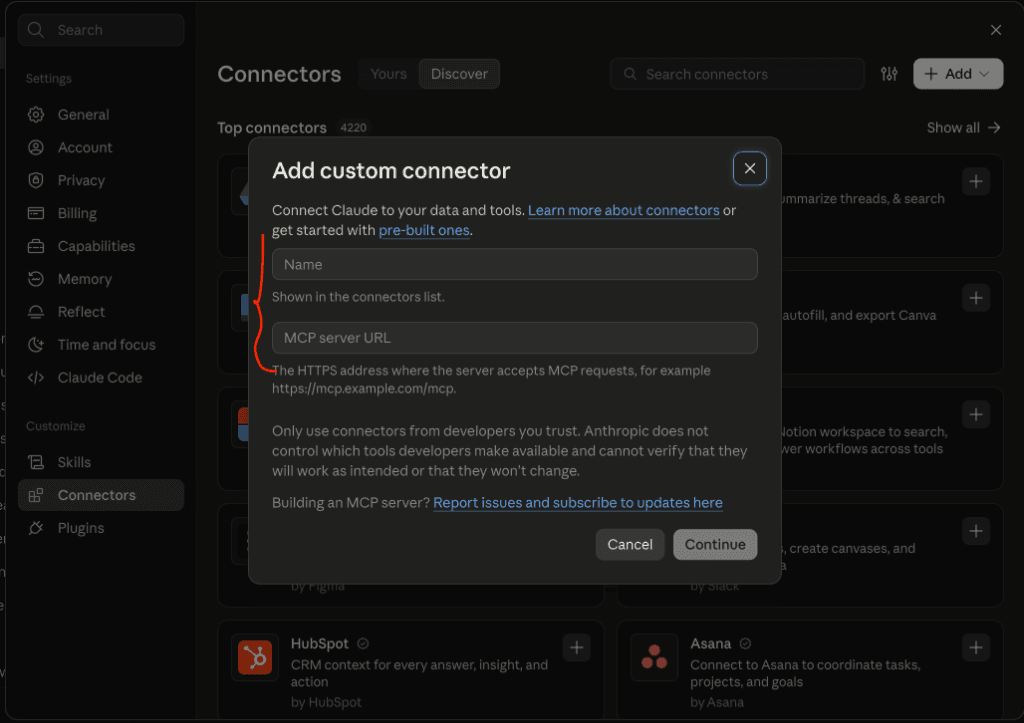
In Claude, navigate to Settings → Connectors.
- Click Add and select Add custom connector.
- Fill in the connection details:
- Name:
weupsell(you can use any name you like) - MCP server URL: Paste the copied URL (
https://app.weupsell.com/mcp)
- Name:
- Click Continue.
6Step 6: Confirm Settings in Claude
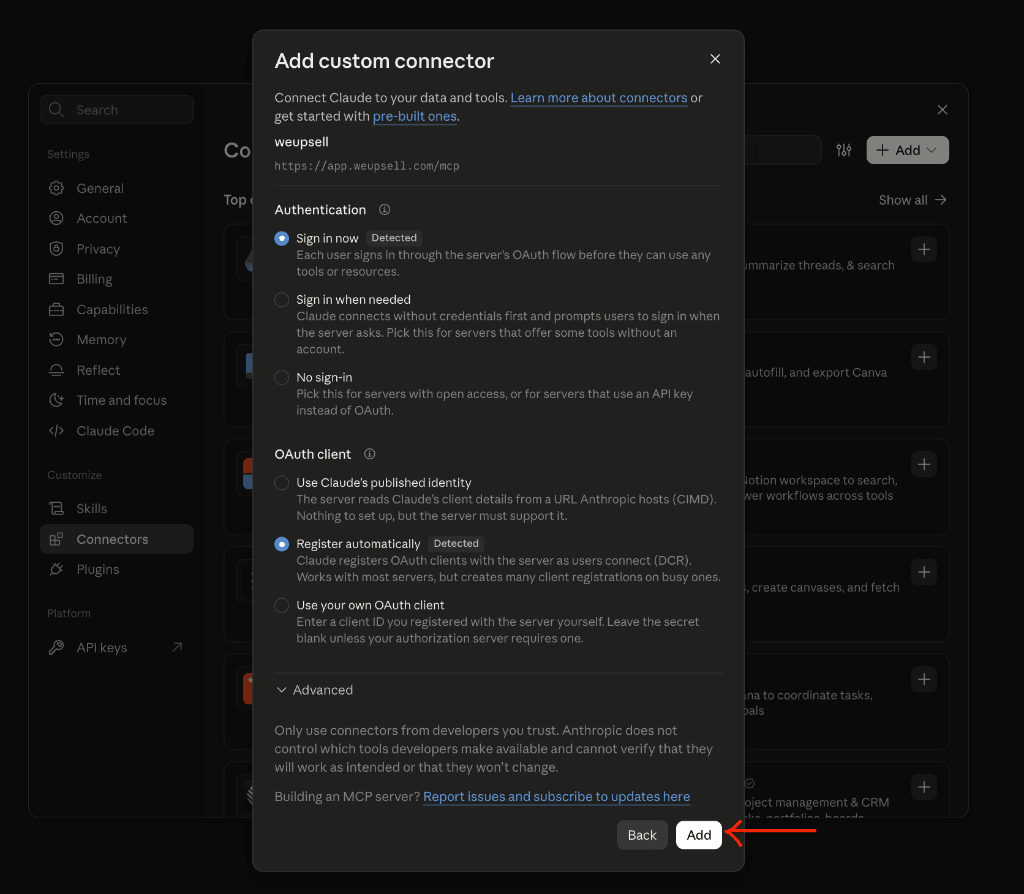
Claude automatically detects the required configuration:
- Authentication: Sign in now
- OAuth client: Register automatically
Leave both settings as they are and click Add.
7Step 7: Click Connect
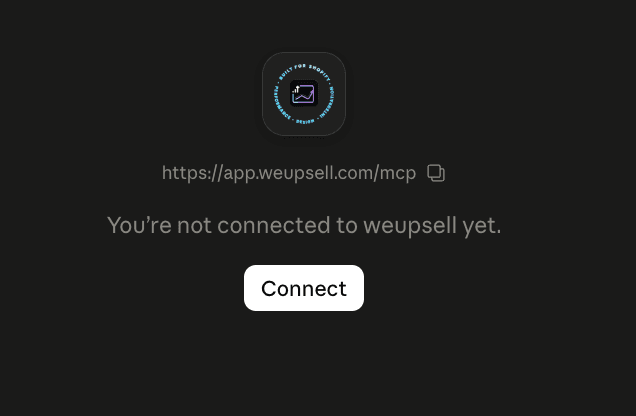
Claude will display the message: "You're not connected to weupsell yet."
Click the Connect button to initiate the secure handshake with your AI Upsell & Cart ‑ WeUpsell account.
8Step 8: Find Your Shopify Store Domain
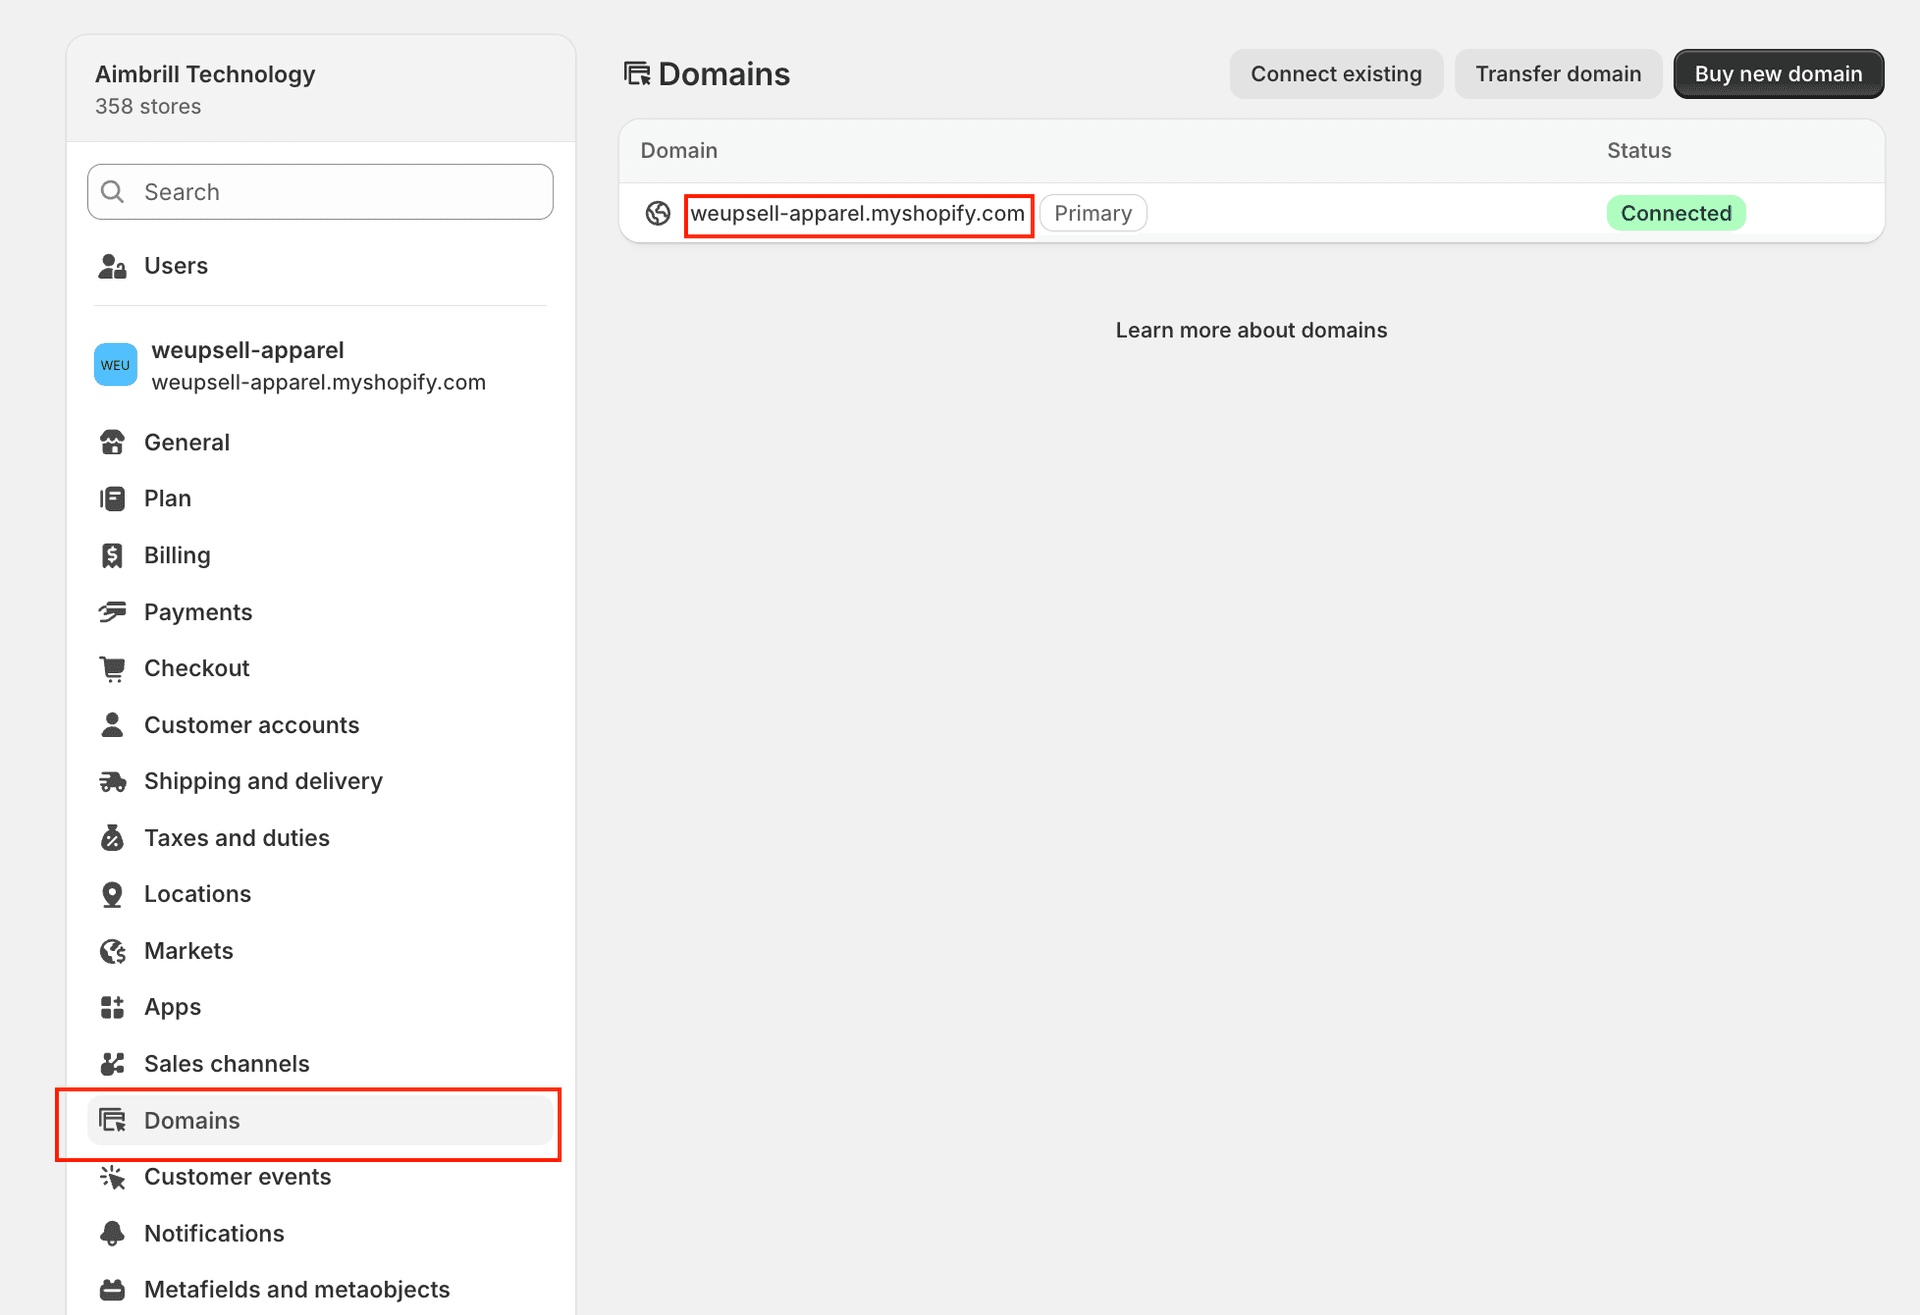
In your Shopify admin, open Settings and select Domains. Under the connected domains, find the domain marked Primary and copy your store's .myshopify.com domain. You will enter this domain in the authorization window in the next step.
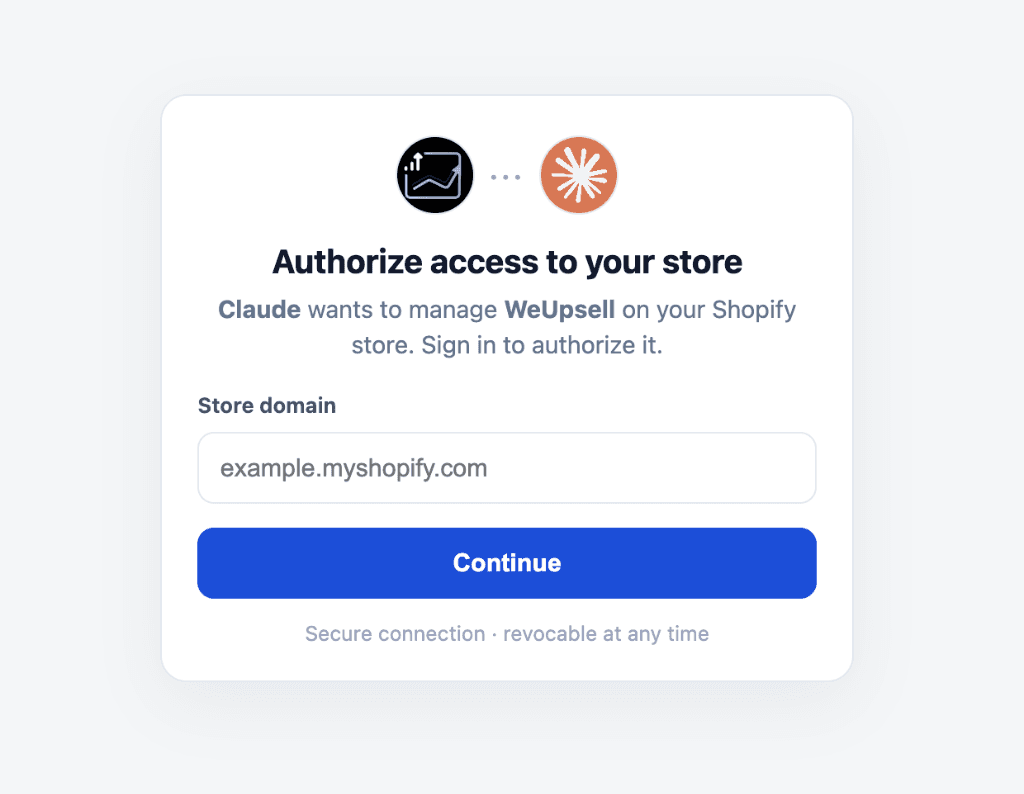
9Step 9: Enter Your Store Domain
On the Authorize access to your store authorization window:
- Type your store's myshopify domain (for example,
your-store.myshopify.com). - Click Continue.
10Step 10: Approve in AI Upsell & Cart ‑ WeUpsell
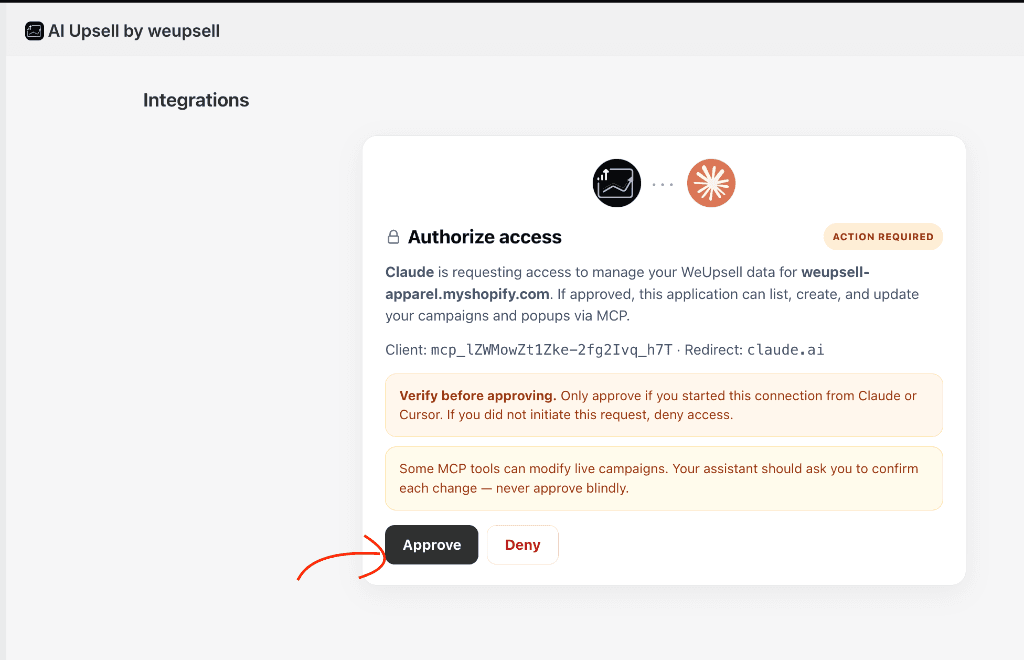
Return to the Integrations page in the AI Upsell & Cart ‑ WeUpsell app inside your Shopify admin. You will see the Authorize access card marked with Action required.
- Check that the store name matches your store.
- Click Approve.
Security Note: Only click Approve if you initiated this connection yourself. If you did not start this connection, click Deny immediately.
11Step 11: Configure Tool Permissions in Claude
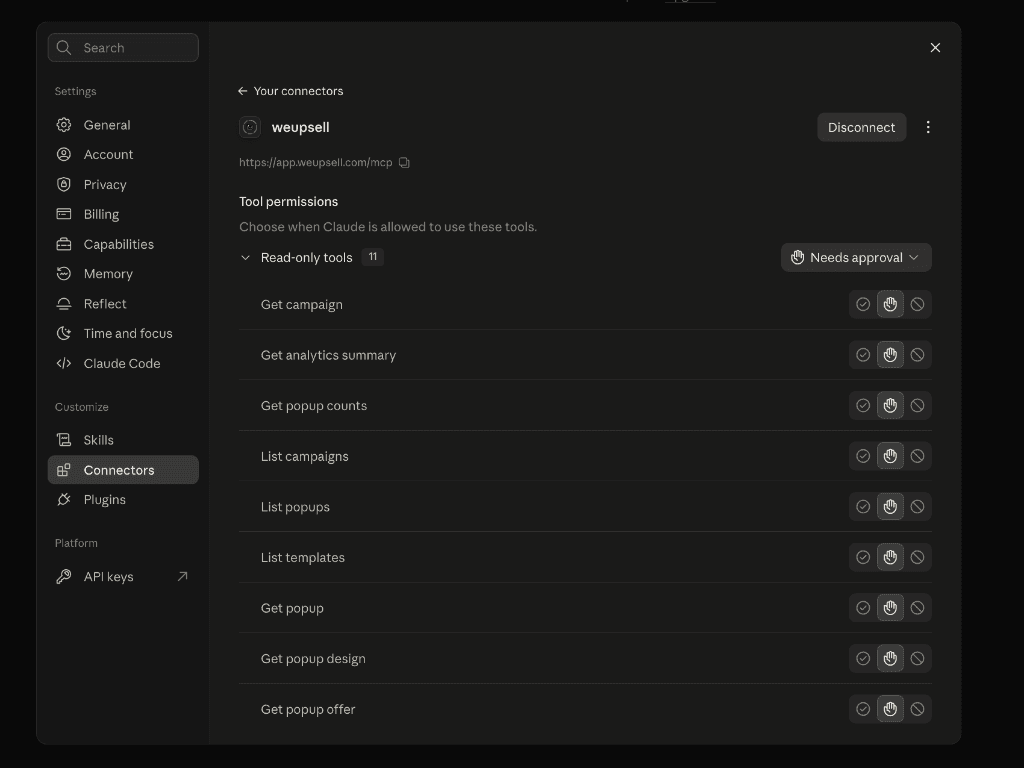
Once approved, Claude will display the 11 tools exposed by the MCP server. For security and control, you can choose how Claude runs each tool:
- Ask every time (Default & Recommended): Claude asks for your explicit confirmation before querying your store.
- Always allow: Claude can query analytics or campaign rules directly without prompting every time a tool is called.
🎉 You're connected! Open a new chat in Claude and ask: "Create a volume discount bundle and add upsell offers for my store" to test your connection.
💬Set Up Your Cart Using These Prompts
Once connected, try asking your AI assistant prompts like:
- "Can you set up my cart with product recommendations?"
- "Can you set up a three-tier reward progress bar at the top of my cart with free shipping at ₹700, a 5% discount at ₹1,799, and a free gift above ₹2,500?"
- "Can you use my store's default font and color theme throughout the cart?"
💻Connecting with Cursor & Other AI Tools
Because AI Upsell & Cart ‑ WeUpsell provides a standard Model Context Protocol endpoint, you can connect it with any MCP-compatible client including Cursor IDE, Windsurf, and Claude Code:
Cursor IDE Setup:
- Open Cursor and go to Cursor Settings → Features → MCP.
- Click + Add New MCP Server.
- Set Name to
weupsell(or any name you prefer). - Set Server URL to
https://app.weupsell.com/mcp. - Save and approve the connection in your AI Upsell & Cart ‑ WeUpsell Integrations page when prompted.
🔧Troubleshooting & FAQs
Why does Claude say "Connection failed" or timeout?
Ensure you pasted the exact URL https://app.weupsell.com/mcp with no trailing whitespace, and verify that you clicked Approve in your AI Upsell & Cart ‑ WeUpsell Integrations page.
Can Claude make unauthorized changes to my store?
No. The AI Upsell & Cart ‑ WeUpsell MCP connector currently provides read-only inspection tools. Furthermore, all tools are configured with explicit approval settings in Claude so you stay in total control.
How do I disconnect or revoke access?
Go to the Integrations tab in AI Upsell & Cart ‑ WeUpsell, find your connected Claude session under Connected, and click Revoke. You can also delete the connector from Claude's Settings → Connectors menu.
💬 Need Help?
If you need any help setting this up, contact our support team. We're happy to walk you through the steps or answer your questions.